
Fusion 360 is renowned for its versatility and ability to streamline the design process. I'm working on a project where I needed to duplicate a part from an old object so I can modify it to fit my needs. This part is irregularly shaped, with lots of curves, so just breaking out the calipers and taking measurements isn't really an option. At least not for me. Back in the day, I remember using SketchUp and an image to recreate an object. I was sure Fusion 360 could do it too. Using an image as a reference can be a game-changer. By harnessing the power of Fusion 360's image-based workflow, I was able to recreate the complex geometries with precision and accuracy. Here's how I was able to leverage Fusion 360's tools and techniques to duplicate the part, using an image as a guiding blueprint.
A reference image
The first step in duplicating a part using Fusion 360 is obtaining a reference image of the original part. You can either capture a high-resolution photograph or locate an existing image that accurately represents the part you wish to replicate. Ensure that the image provides a clear and detailed view of the part from multiple angles. For my purposes, I only needed a single, top-down image. To capture it, I set the object on the floor and zoomed in with my phone so the object filled the entire frame. I remember reading that being further away from an object and zoomed in captures the object more accurately than being closer and zoomed out. Something about the narrower field of view causing less distortion.
Import the image
Once I had the reference image, it was time to import it into Fusion 360. I opened Fusion 360's modeling workspace and navigated to the Insert tab. From there, I selected Attach Canvas and chose the reference image file and placed it on the Front plane. This was so when I created the part and later exported it as an STL, it would be correctly oriented. The last thing to do before you start drawing is to adjust the scale to match the actual dimensions of the part. This is done by right-clicking on the canvas and selecting Calibrate. From there, it's a matter of picking two points on the image that I could easily measure and entering that measurement. Now the image is scaled to the same size as the physical part.
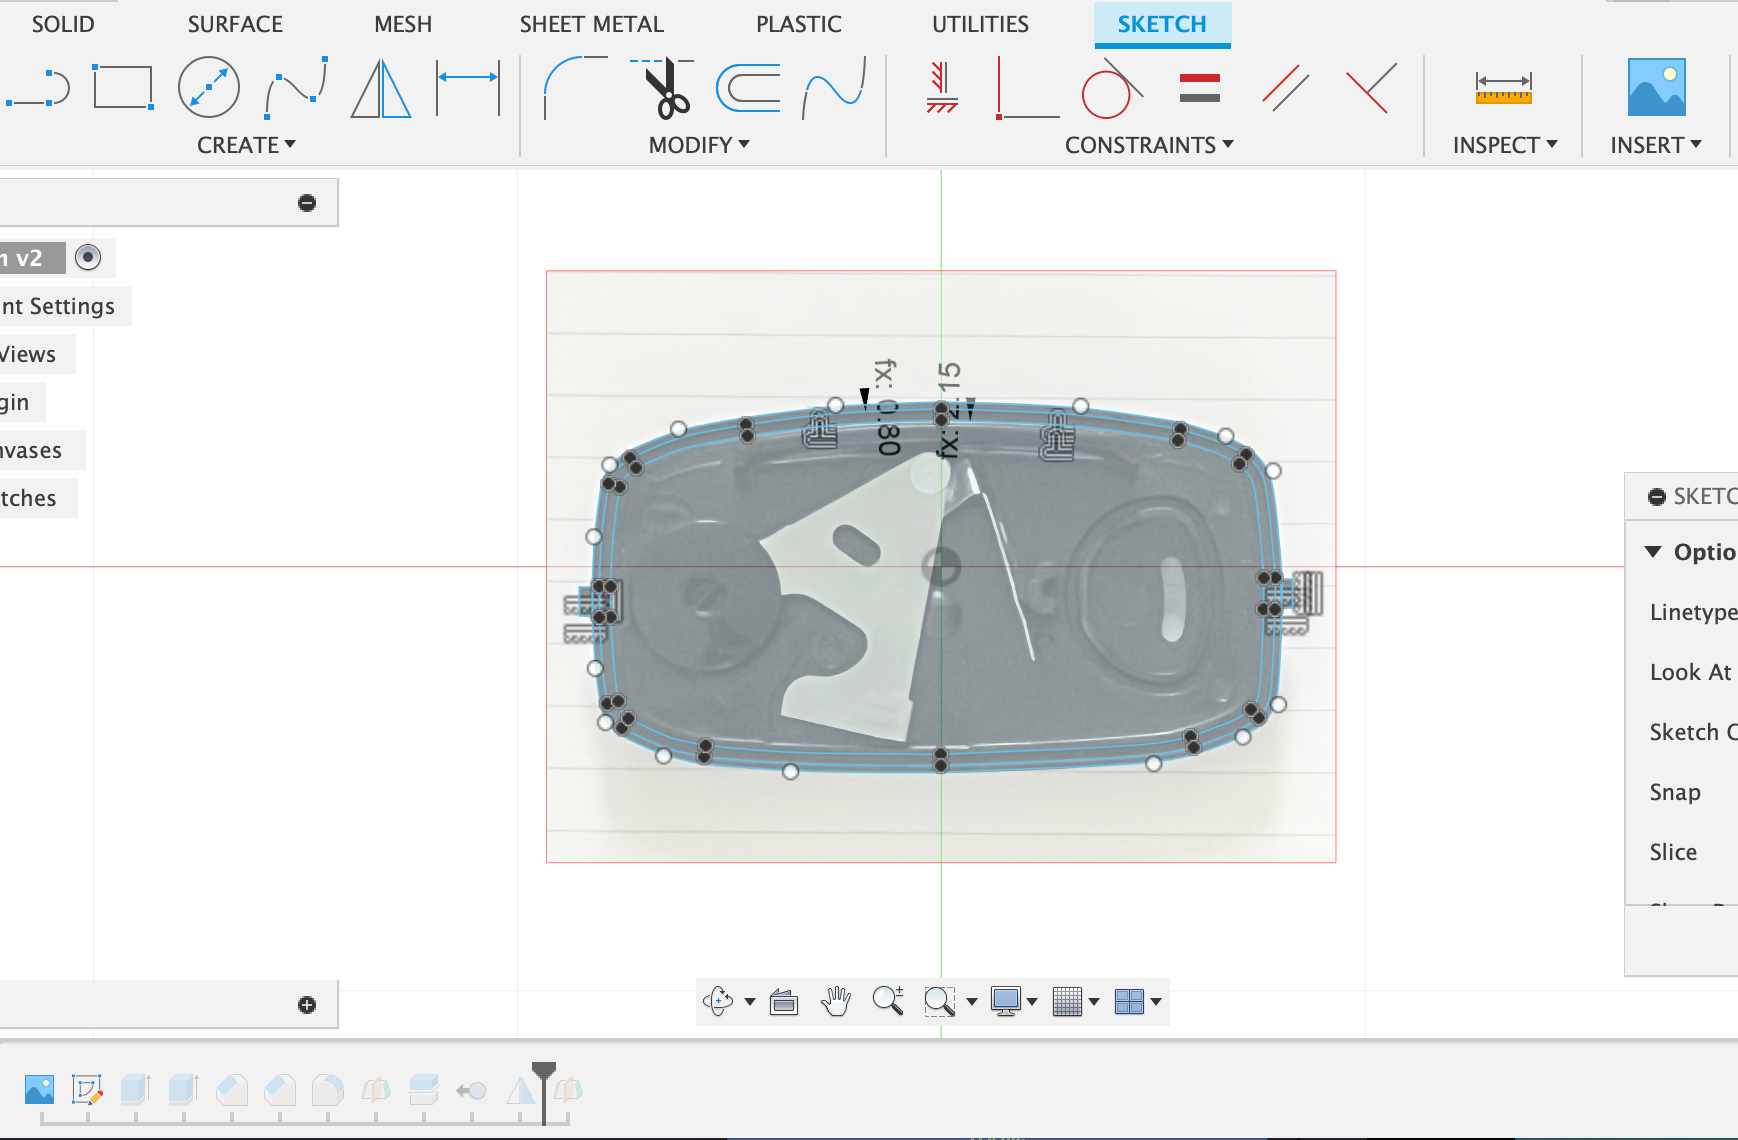
Sketching the basic outline
With the reference image in place, I started sketching the basic outline of the part using Fusion 360's sketching tools. I began by creating a new sketch on the same plane as the image. Then I used lines, arcs, and rectangle tools to replicate the overall shape of the part.
Utilize constraints and dimensions
To ensure accuracy and maintain parametric control, apply constraints and dimensions to your sketch. Fusion 360 offers a range of constraint options, such as coincident, parallel, perpendicular, and tangent, that allow you to precisely define the relationships between sketch entities. Additionally, assign appropriate dimensions to ensure the replicated part matches the original's proportions. This step enables your design to adapt and scale smoothly in case adjustments are required later on. While I did not use any constraints for this particular portion of the project, I did create parameters to use as dimensions. This came in handy later on.
Extrude and Refine the Model
Once I had the basic sketch, it was time to extrude and transform it into a 3D model. Using Fusion 360's extrusion feature, I selected the desired portions of the sketch and specified the desired height, using parameters, to give the part volume. I also added a small fillet (round-over) to the bottom edge to give the part a nice, finished look.
Validate and Iterate
Once I had a complete model, it was time to validate its accuracy and functionality. To do this, I exported it to an STL file and printed it with a .3mm layer height so it printed fairly quickly. Then I attempted to fit the part. As it turned out, once side fit fairly well, while one side did not. The nice thing about this part is that it's symmetrical. So, I was able to create a mid-plane, cut the part in half, delete the side that did not fit, and then mirror the side that did. One more re-print and I had a part that almost fit perfectly. I made one quick adjustment of the parameters I created to loosened up the tolerances a little bit and one more test print and I had a part that fit quite well.
Wrap-up
Using Fusion 360's image-based workflow allowed me to recreate a physical object with precision and efficiency. By importing a reference image, sketching the outline, applying constraints and dimensions, extruding the model, and refining it iteratively, I created a faithful replica of the original part. Fusion 360's robust tools and parametric capabilities ensure accuracy while maintaining flexibility for modifications. So, whether you need to replicate a component for repair or reproduce an intricate design, let Fusion 360's image-based workflow be your gateway to duplicating perfection.