I recently had to fix the wiring in a utility trailer that had spent the better part of the last 15 years in a field. Apparently, mice find wiring fairly tasty. Some of the wires were chewed through completely like this yellow wire:
munched wiringOthers were just sort of munched on. This was not really as bad, but still needed to be repaired.
Fortunately, the wiring all comes back to junction box near the back of the trailer. That seemed to be where the mice came in and did the most damage. I pulled down the panel behind the junction box and started cutting out chewed wiring and patching in new wiring with butt connectors.
There was really nothing all that complicated about it. This trailer only uses 4 wires. White for ground, brown for running lights, yellow for left turn signal/brake and green for the right turn signal/brake. You'll notice a black in there too, that's for the accessory light inside the trailer. It's actually tied to the brown. In a 7 wire setup, that would be on it's own, but... it's not. 7 wire hookups are for trailers with electric breaks. This one isn't that big.
As I was wrapping things up, I started testing the lights. Things initially looked good! The lights on the doors were working! Then I started putting the wiring back into the junction box and things got janky. The lights stopped working! What was going on? I couldn't find any more breaks in the wires. Using my tester (an alligator clip and a probe with an LED on it), everything seemed to have power. The bulbs all checked out, but would not light. It was turning into a mystery!
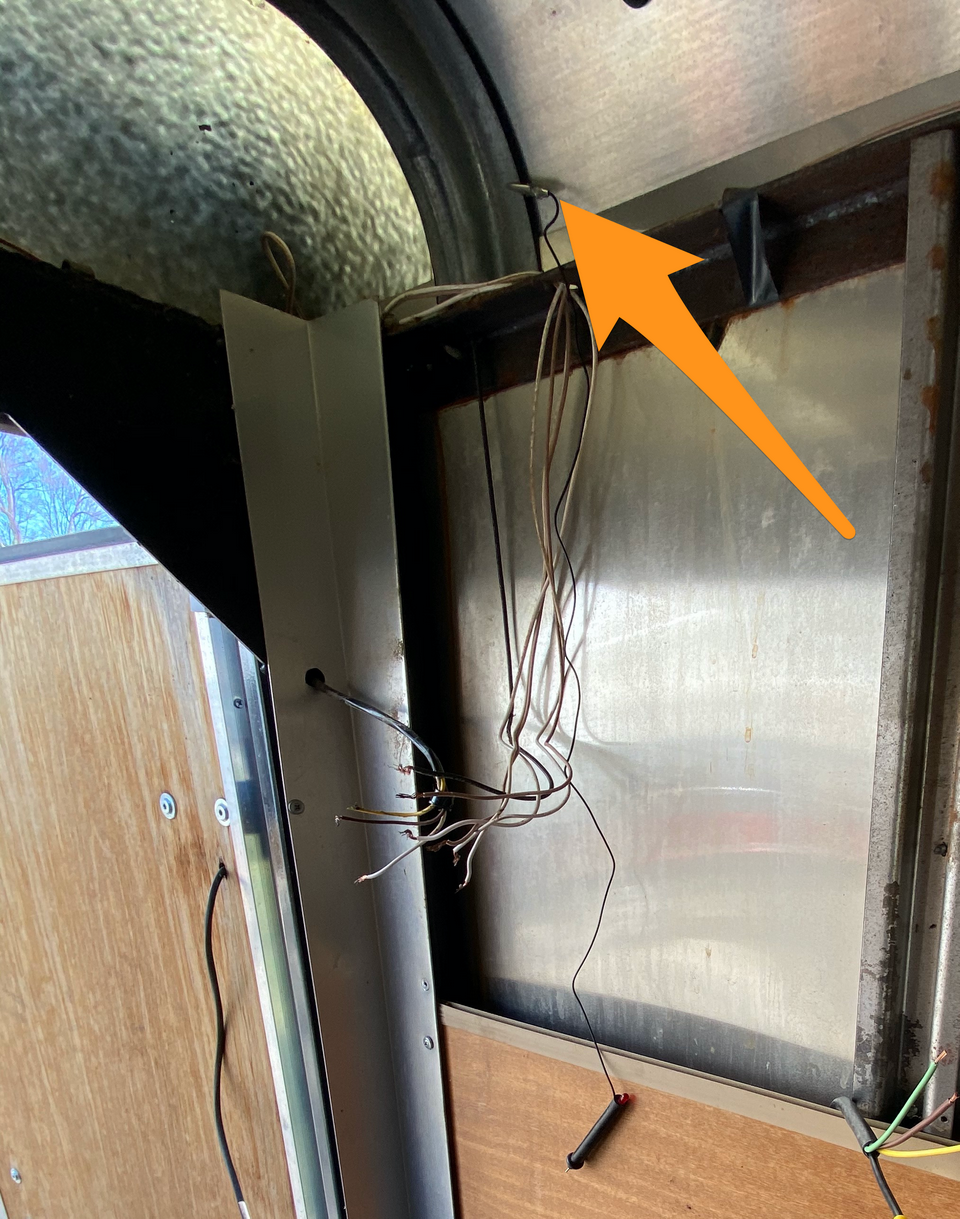
Turns out, grounding is key! The frame of the trailer actually acts as the ground for the circuits. Most of the lights are just grounded to some point in the frame. Some tie back to the junction box and then there is a wire that goes to a bolt on the frame. If you notice in this picture, I have my tester clipped to part of the frame. When I had the clip there, the circuits always tested good (but no lights). When I moved my tester to the bundle of white wires, that's where things started to go south. Sometimes it would test good, sometimes it wouldn't. I was starting to think that the ground wire had a break in it that I couldn't see. As I started to trace it to it's grounding point on the frame, I noticed that the nut on the grounding bolt was loose. Ah ha! I tightened the bolt and my lights came on! Funny thing was, it was a nylock nut. I'm really not sure how it came loose!
Tidied upWith the mystery solved, I buttoned everything back up. It was just a matter of wire nutting the same colors together, coiling it all up and putting the cover plate back on. At every step, I checked the lights to make sure I hadn't missed any broken wires. Everything checked out, even with the doors shut! With a hour or two's worth of work, I went from having only one or two marker lights working to a fully lit trailer, tail and break lights included! Well, almost.
The tail lights on the trailer consist of two bulbs, each behind their own red lens. What I noticed was that when I turned on the marker lights, only the bottom light came on. My trouble shooting kicked in and I swapped bulbs. Still, the bottom bulb lit, but the top bulb didn't. As I was unscrewing the fixture from the trailer, the top light would flicker on and off. Oh great, another grounding issue.
If you take a look at the back of the light, there is a metal bar rivetted between the backs of both fixtures. The reflectors (backs) and the bar appear to be aluminum. But, if you notice, the top rivet is rusted. I can only guess that the rivets are made of some sort of ferrous metal. And with it being rusted, it's causing an intermittent, bad ground.
To fix the issue, I pulled out some self tapping screws and screwed a piece of wire between the two reflectors. Viola! I have a good ground between the two lights and the bulbs were lit! I had to do that on both sides. Now I truly have fully functioning trailer lights! I can safely put it back into service.